Back to Adinkra Cookie Cutters
Ultimaker Cura Guide
Steps to go from STL file to final 3D print
- Download STL of Adinkra symbol & Ultimaker Slicer (download)
-
Once Ultimaker Slicer is installed and opened, select desired printer from the menu of printers (only applicable if
first time installation)
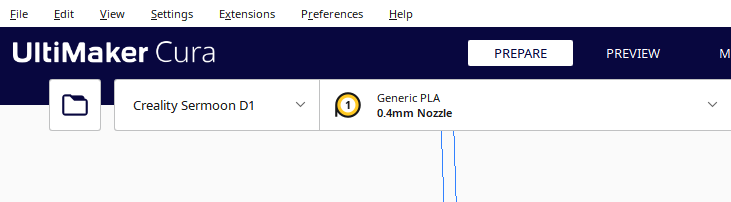
- Import STL file using folder icon in the top left corner of the screen.
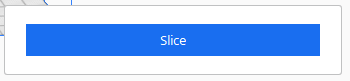
- Go to the top right corner of the screen, where it says “Standard Quality” and click on it and a box will appear. From here, click on “Show Custom” and search “Thin Walls” in the search box near the top. Check the setting enabling thin walls.
- Once the file is imported and it is visible in the window on screen, press the slice button in the bottom right corner
-
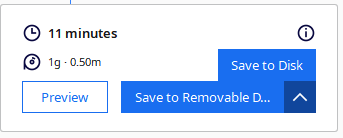
Once the model has sliced, press “Save to Disk” or “Save to Removable Drive” in the same
location as the Slice button was (make sure if saving to disk to save in the right place) this should be a .gcode
file
- Insert SD card into printer
- Turn on and plug in the printer
-
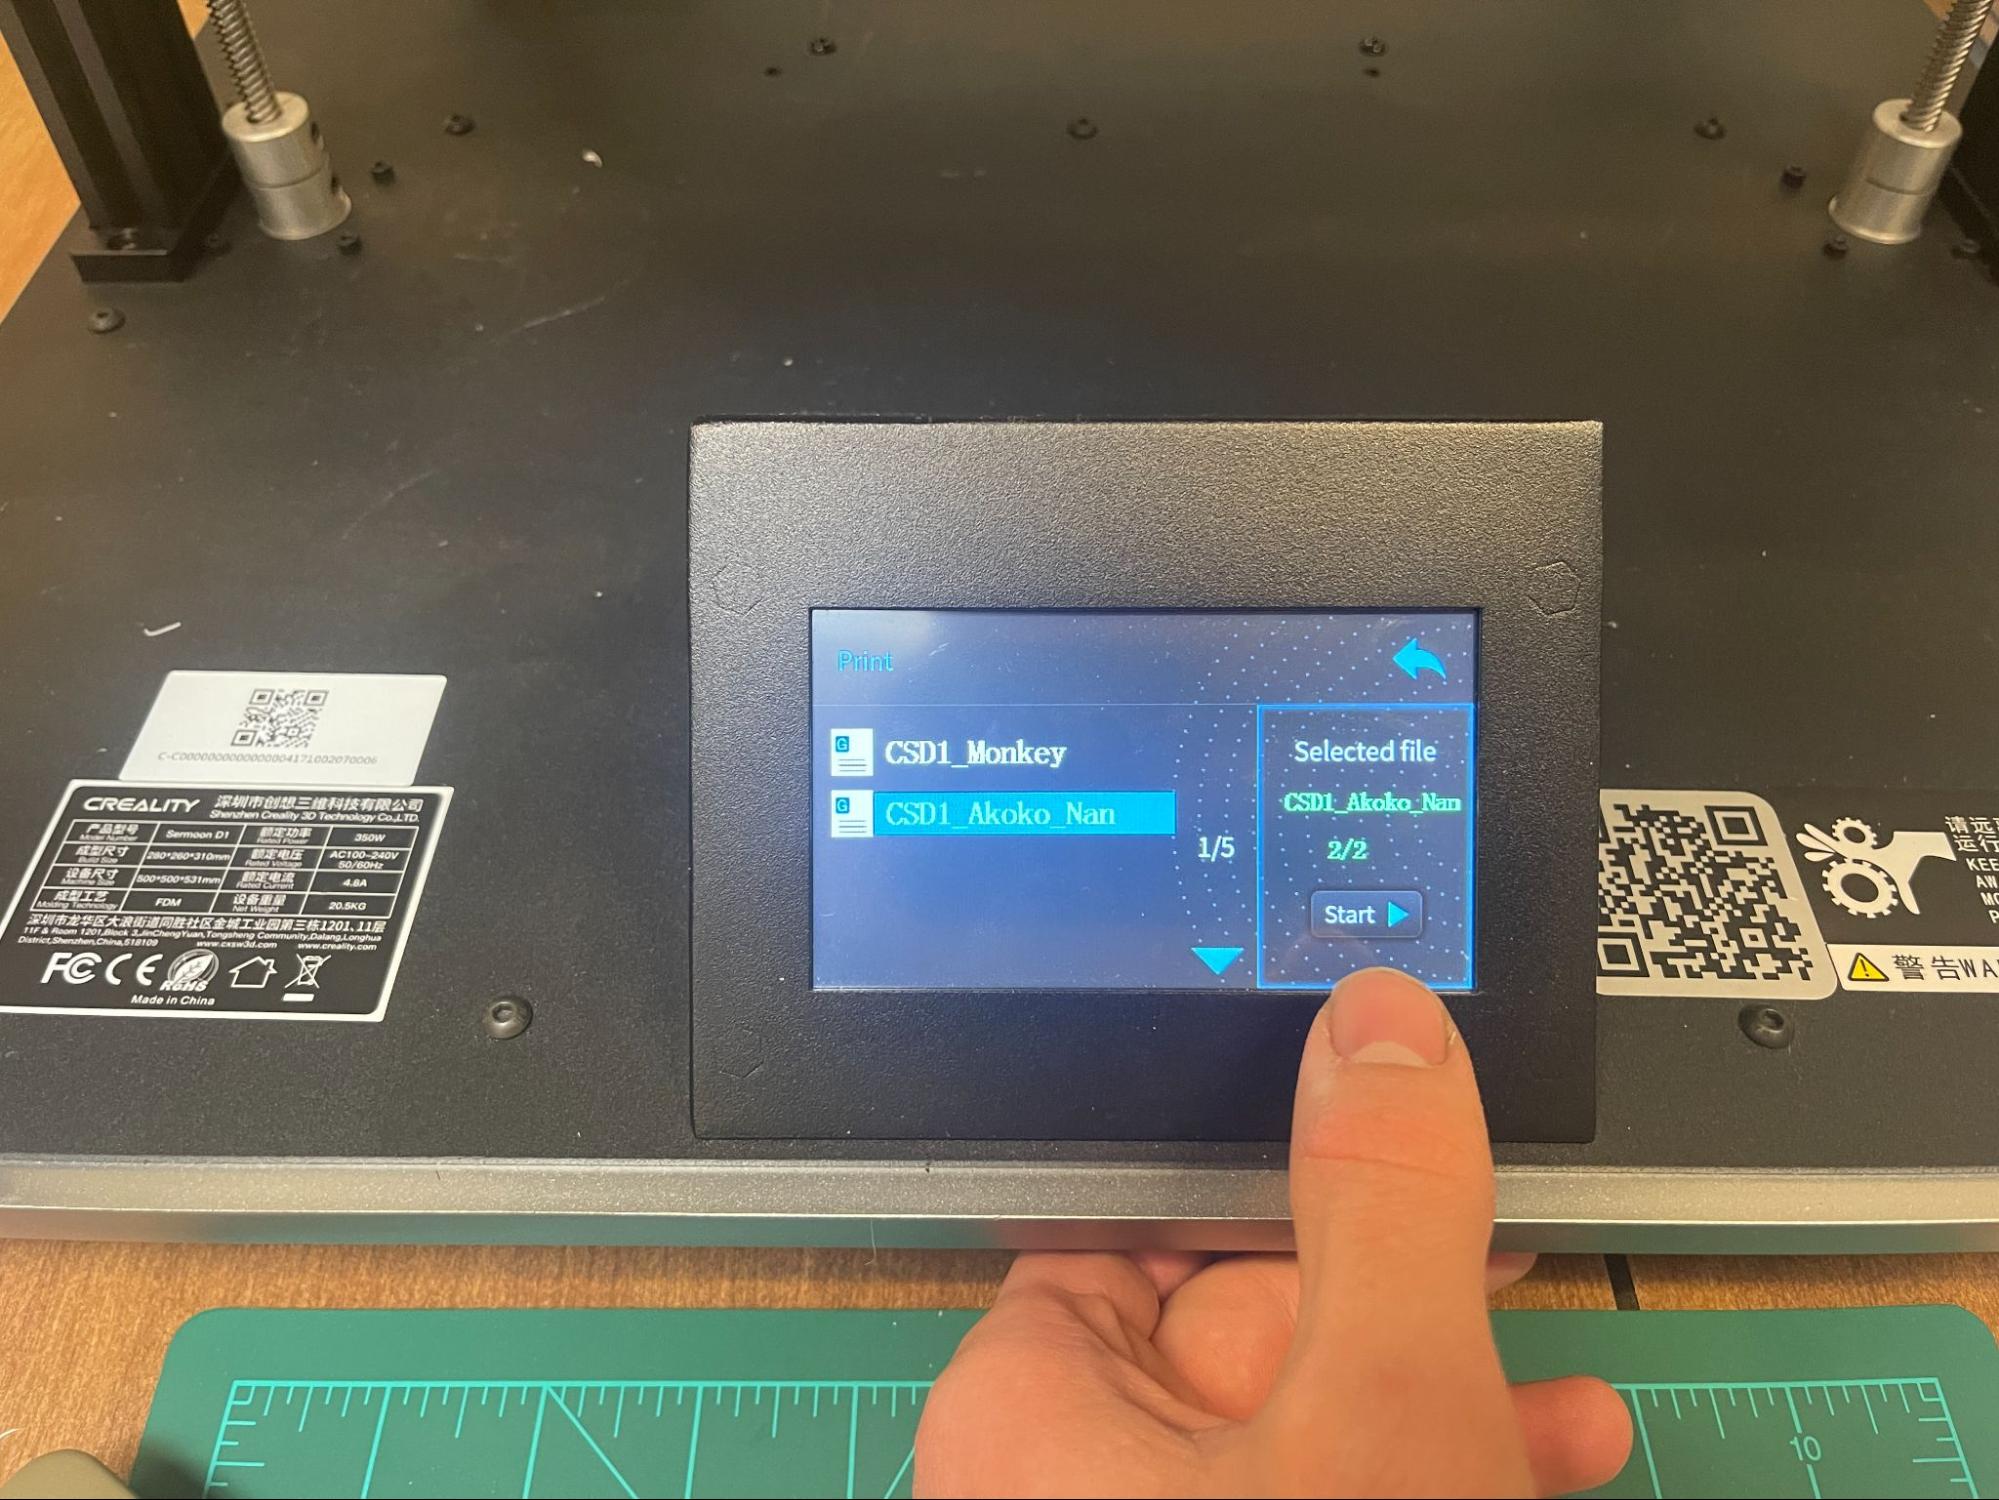
Select “print” from the main menu screen
- Your exported file should be visible, select it, press start, and allow the print to begin!
-
Once print has finished and the machine has cooled, remove the print